Sharing data
With TriplyDB you can easily make your data available to the outside world.
Sharing your dataset
You can share your dataset by setting the visibility to “Public” in the dataset settings menu. Making a dataset public in TriplyDB has the following consequences:
- The dataset can be searched for and visited by anybody on the web.
- The dataset will be indexed by web search engines such as Google Dataset Search.
- Any services that are started for that dataset will be available to anybody on the web. This includes SPARQL, Text Search, and Linked Data Fragments.
Dataset settings page
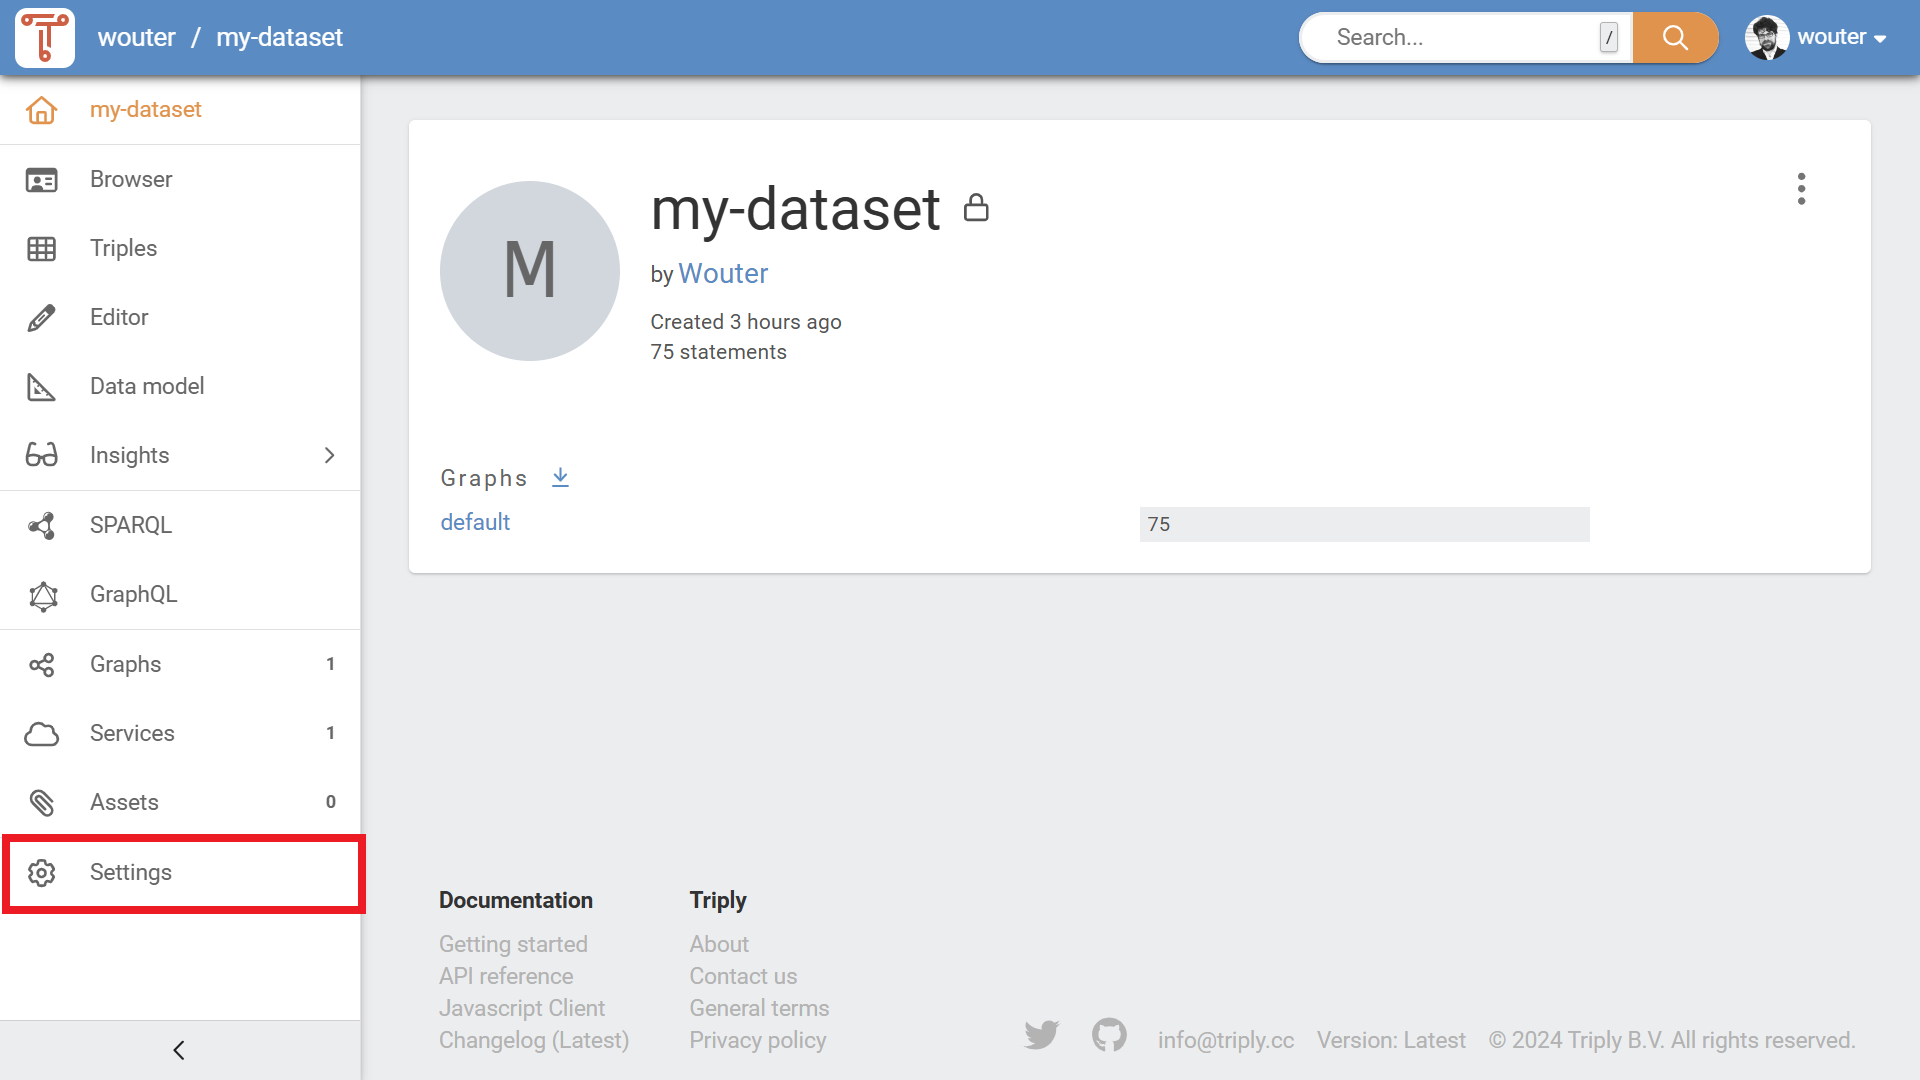
The dataset settings page can be accessed from any dataset page. It appears as the last item in the menu to the left (see Figure 1).
The dataset settings page contains the following items:
- Update dataset profile
- Prefixes
- Transfer ownership
- Delete dataset
- Webhooks
Update dataset profile
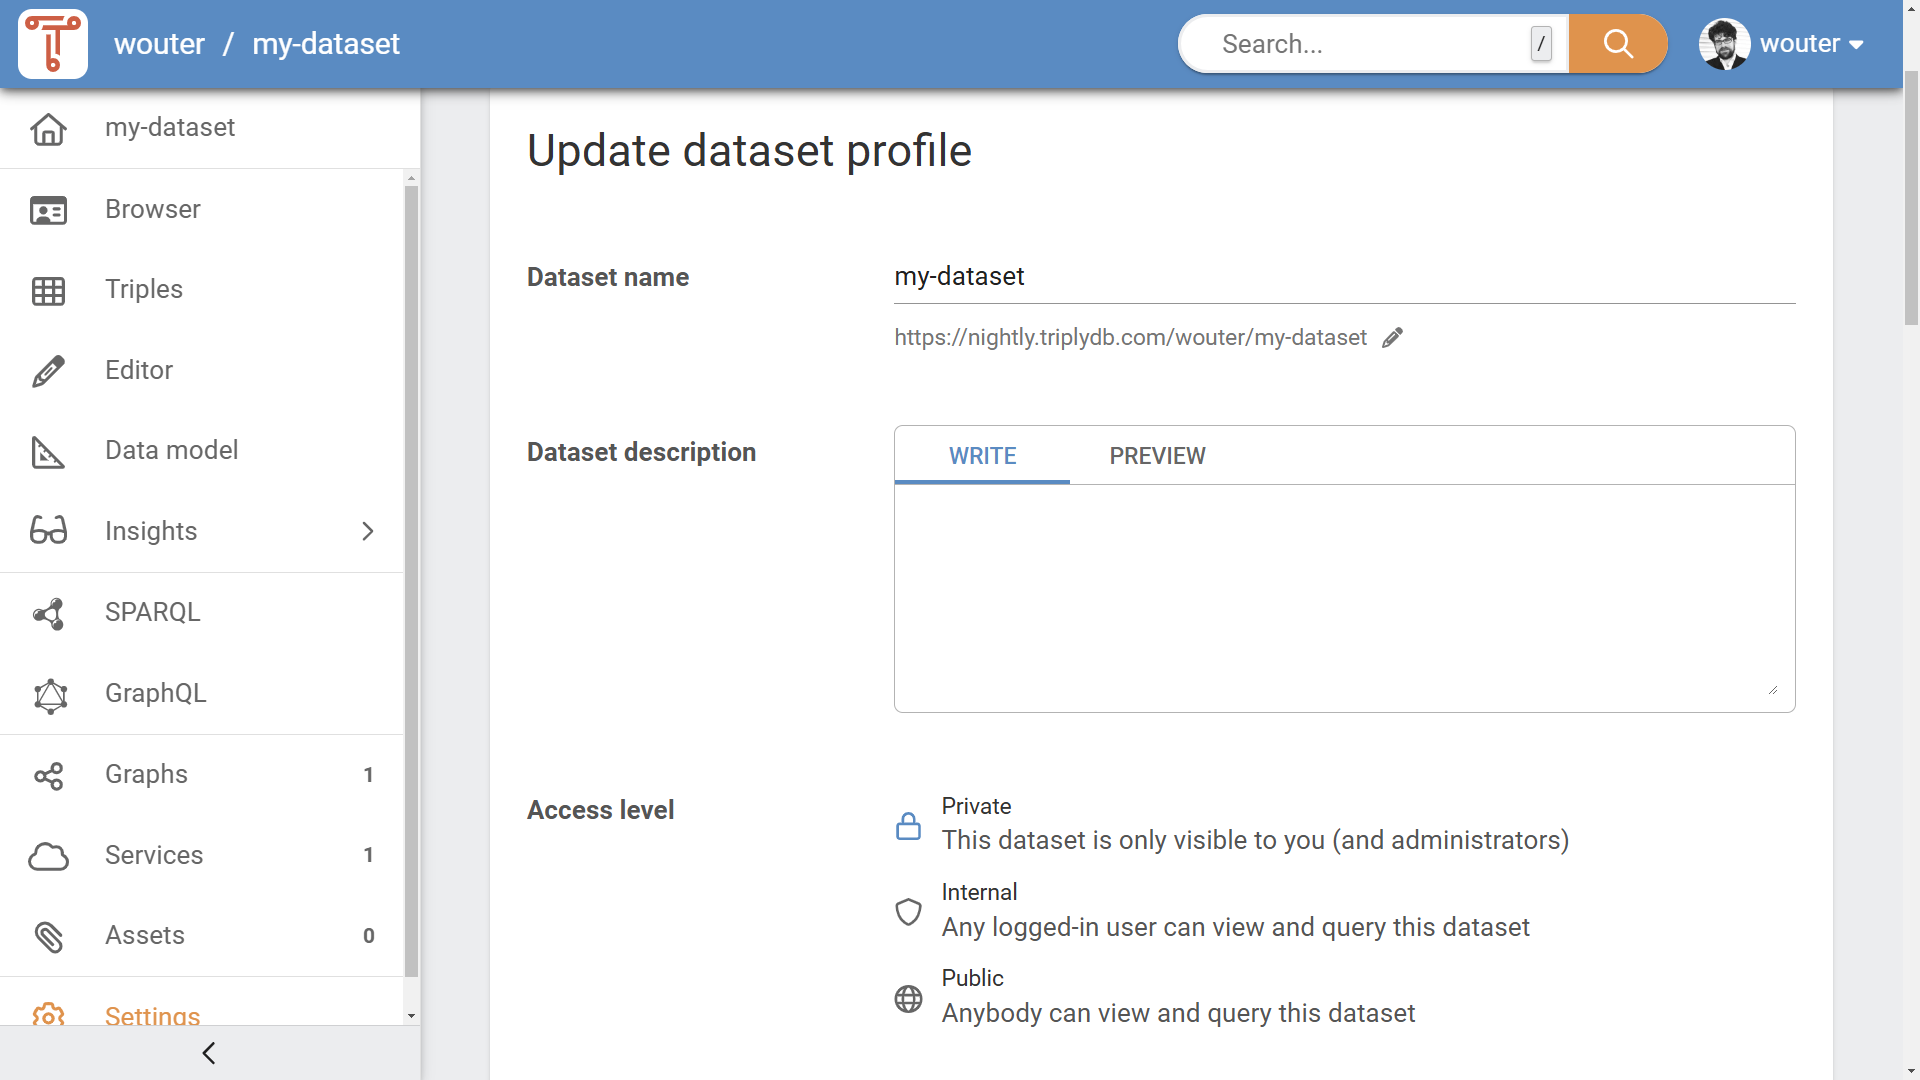
The "Update dataset profile" pane (see Figure 2) allows the following things to be configured:
- Dataset Access Level, see Section Access Levels.
- Dataset metadata, see Section Dataset metadata.
Dataset metadata
Adding metadata for your datasets is important. This makes it easier to find your dataset later and also allows search engines and social media applications to understand your dataset.
The "Update dataset profile" pane allows the following metadata to be configured:
- Dataset name
- Dataset slug
- Dataset description
- Example resources
- License
- Avatar
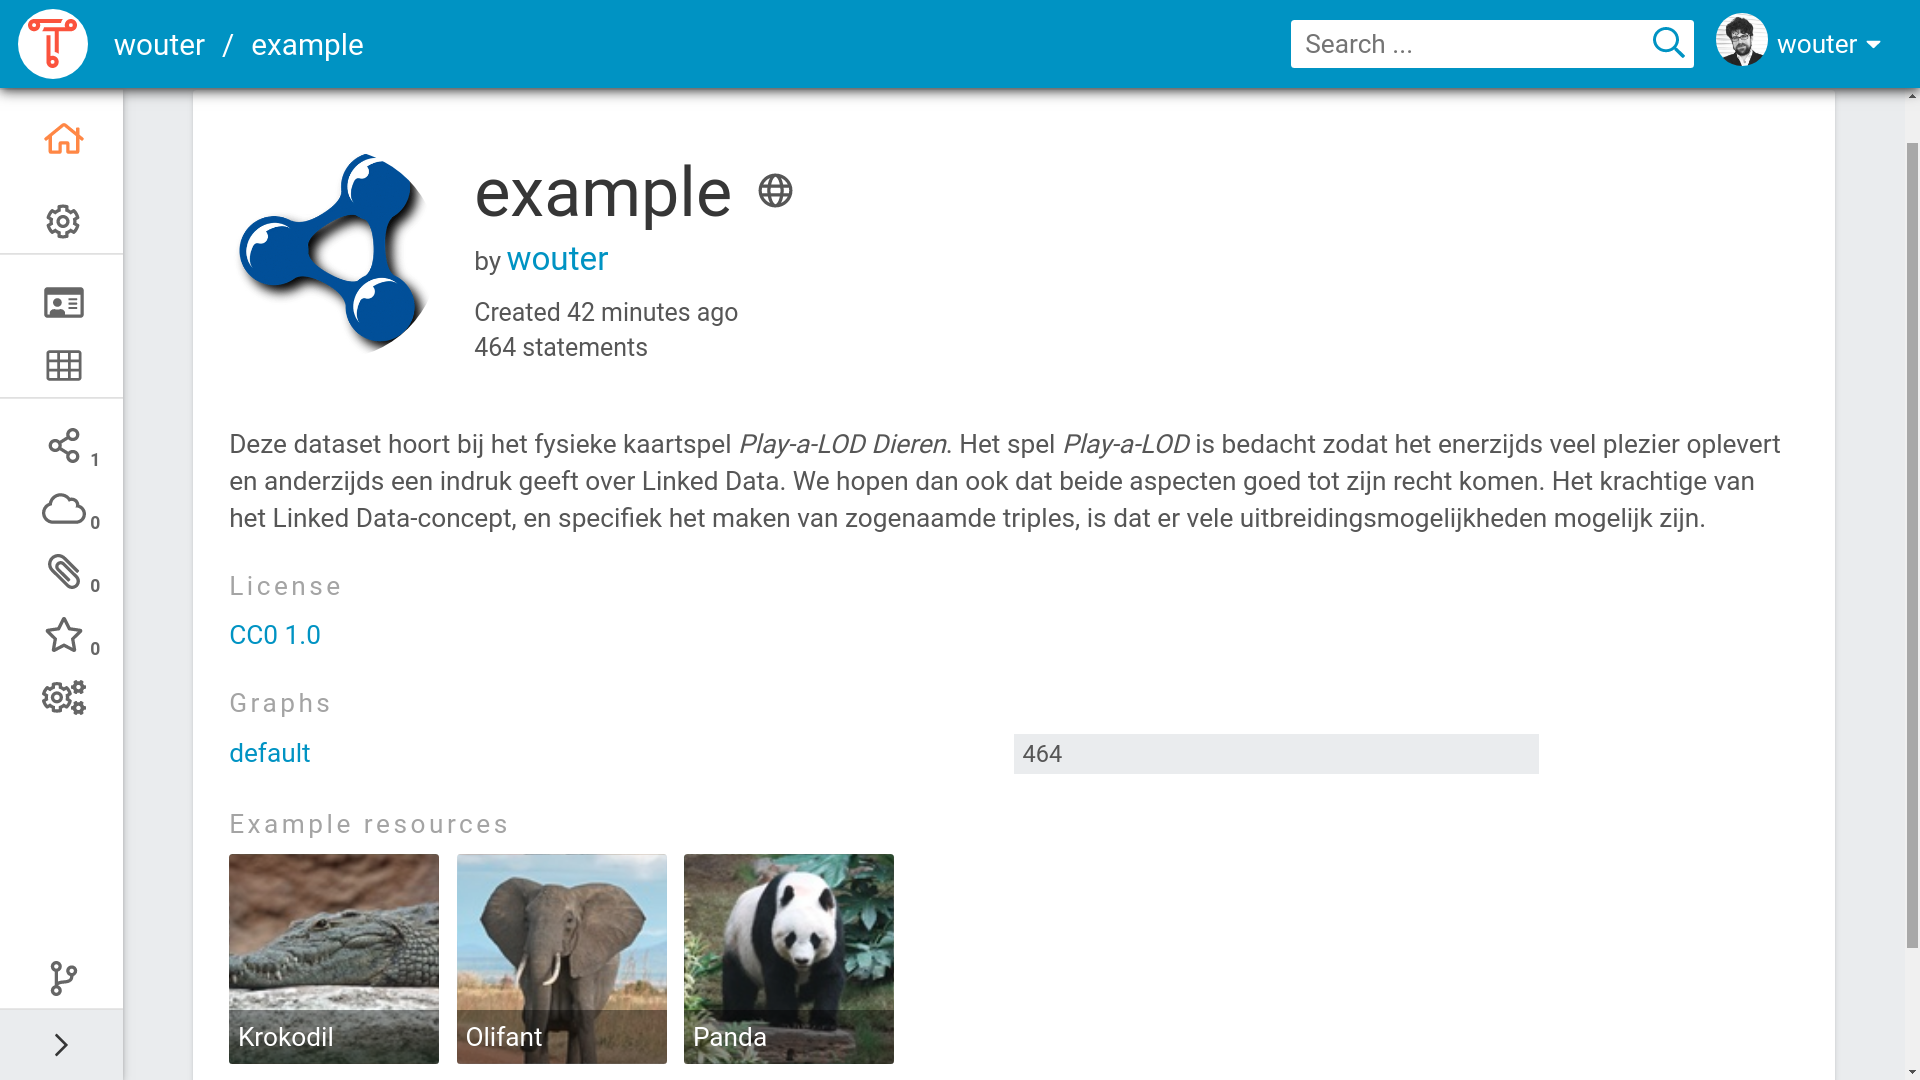
Within the TriplyDB instance your dataset is now more findable for users. Whenever a user searches on one of the topics of your dataset, or types in a word that is present in the description of your dataset, the dataset will be shown as a search result. The metadata will allow TriplyDB to give a better impression of your dataset when a user visits. Figure 3 shows the dataset homepage of a dataset for which metadata has been configured.
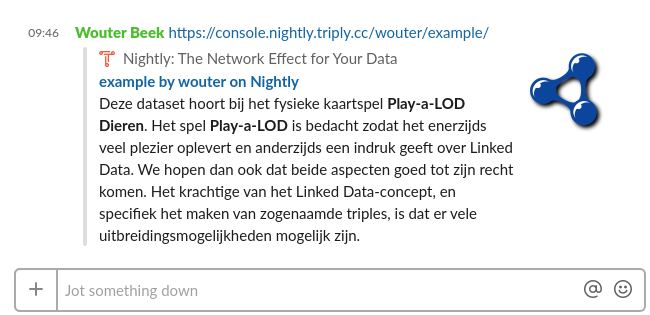
Search engines and social media applications can recognize the metadata that is entered for datasets in TriplyDB. Figure 4 shows an example of a Social Media widget in the Slack chat application. Such widgets are automatically generated upon entering the link to a public dataset in TriplyDB. The chat application in Figure 4 understands the metadata properties: title, description, and image. Different Social Media applications may make use of different metadata properties.
Starting services
By default, datasets in TriplyDB can be queried through TriplyDB-js as well as through the Linked Data Fragments API.
In order to allow additional query paradigms, specific services can be started from the “Create service” dialog. Click on the “Services” icon in the left-hand sidebar, then on “Create new service” in the top-right corner.
TriplyDB instances can be configured with different types of services. The below screenshot shows the “Create service” dialog for a TriplyDB instance that allows Virtuoso SPARQL, Jena SPARQL, and Elasticsearch services to be created. Give the service a name, pick its type, and click “Create service”.
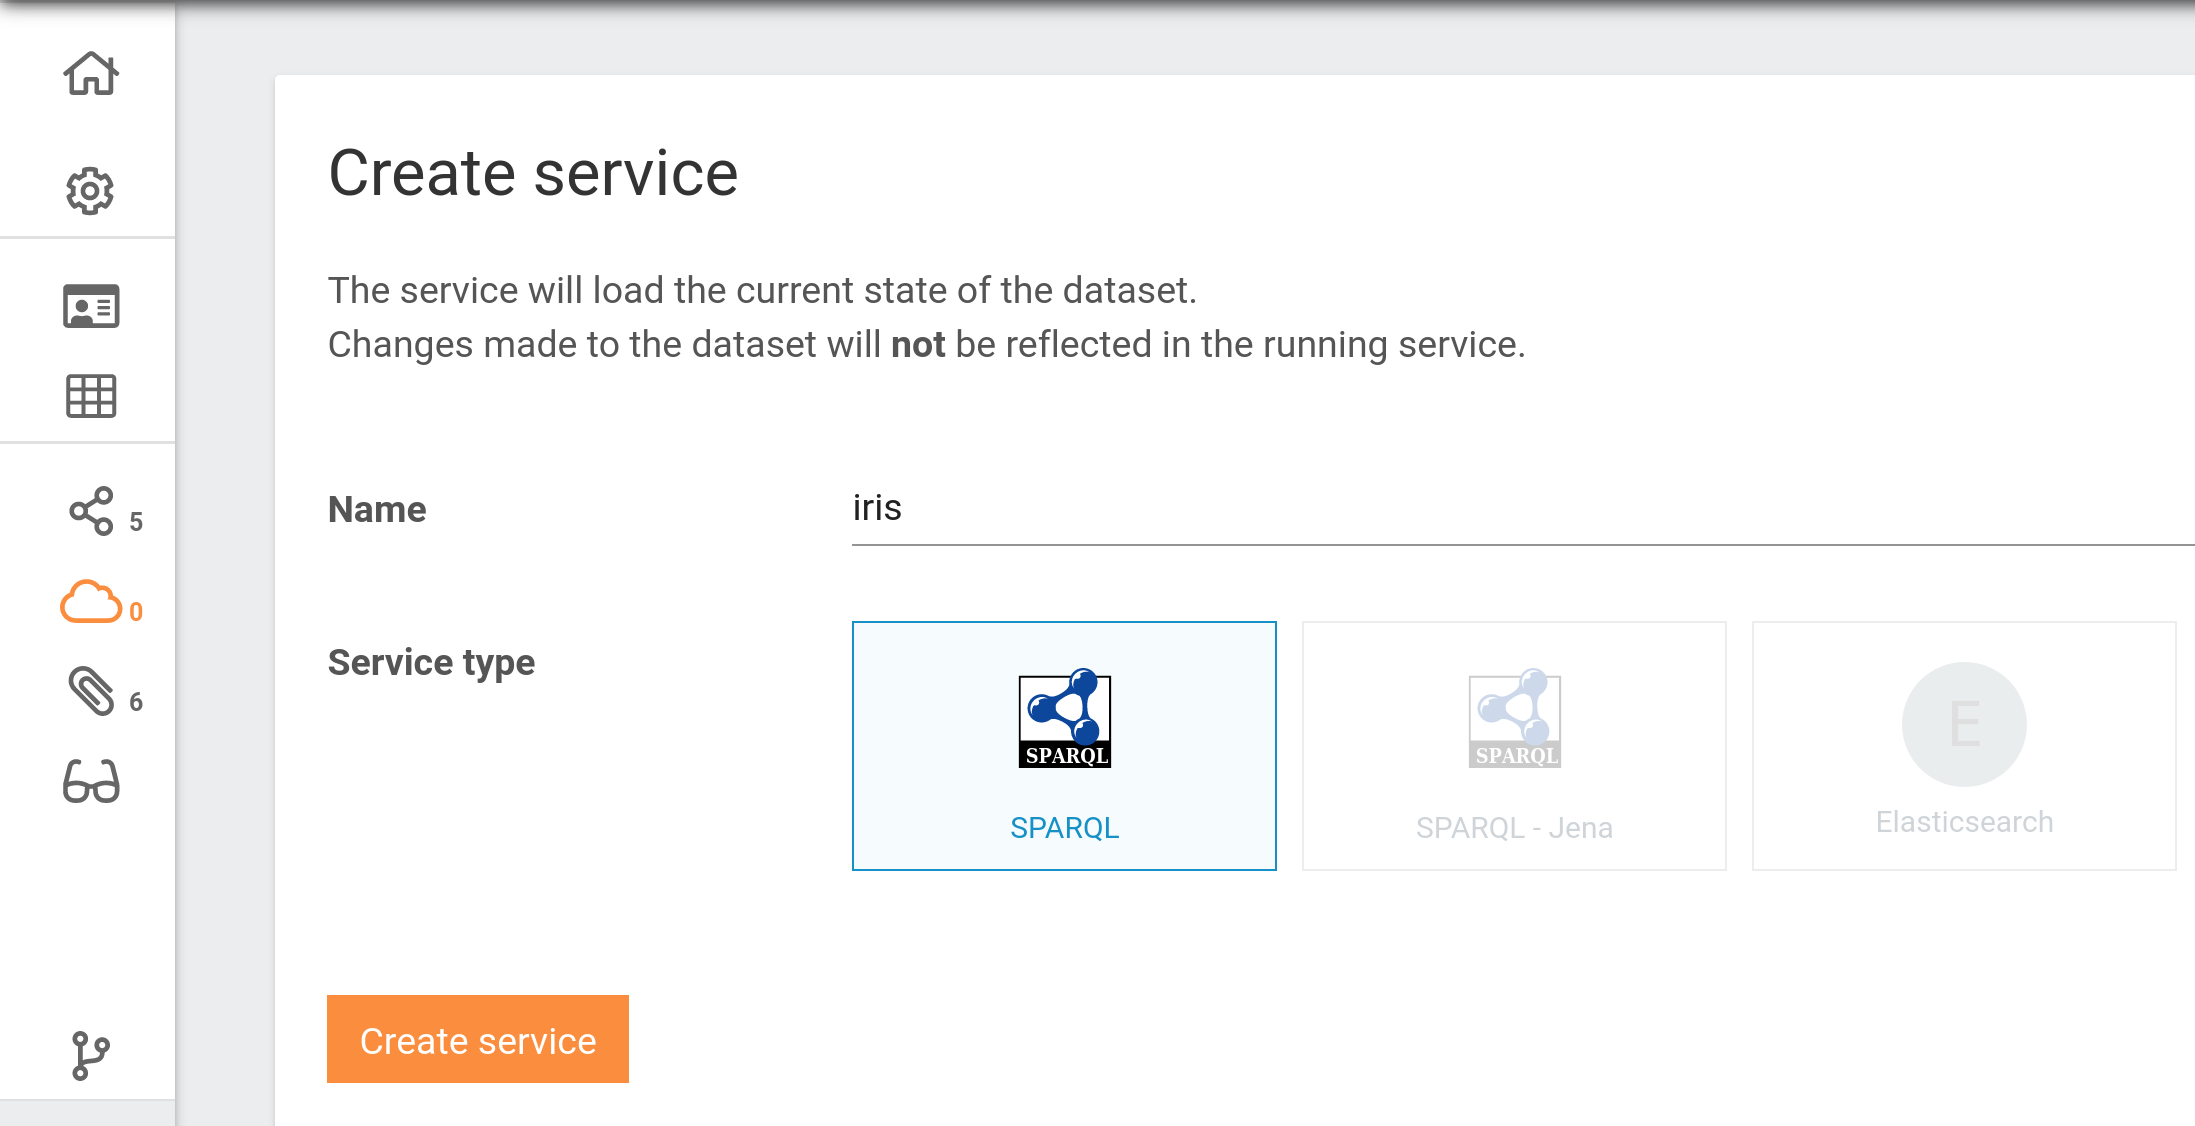 Notice that three different types of services can be created.
A service loads the state of the dataset at the moment it is created; later changes to the dataset are not reflected in it until it is updated. It is possible to create multiple services for one dataset.
Existing services
Existing services are each displayed on their own card, showing the type, status, protocols and the number of statements loaded (see screenshot). A service is deleted from its card, and created with the button above them.
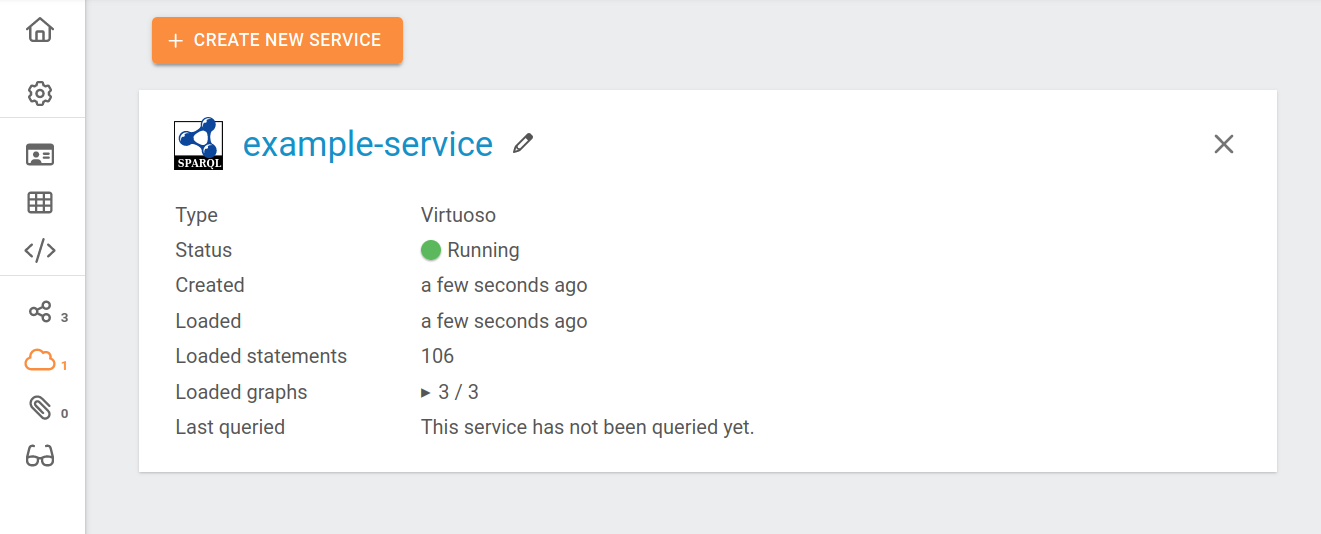
Datasets can change whenever a graph is added, deleted or renamed. When this happens, the data in a service is out of sync with the data in the dataset, and a warning appears on the service ending in "Click here to update." Following that link synchronizes the service with the current state of the dataset. A service has to be running before it can be updated.
Webhooks
If you want to be notified or trigger an event when anything changes in your dataset, you can set up a webhook.
Webhooks are configured in the "Webhooks" section of the dataset's settings page. Open it and click "Add webhook"; the dialog shown below appears.
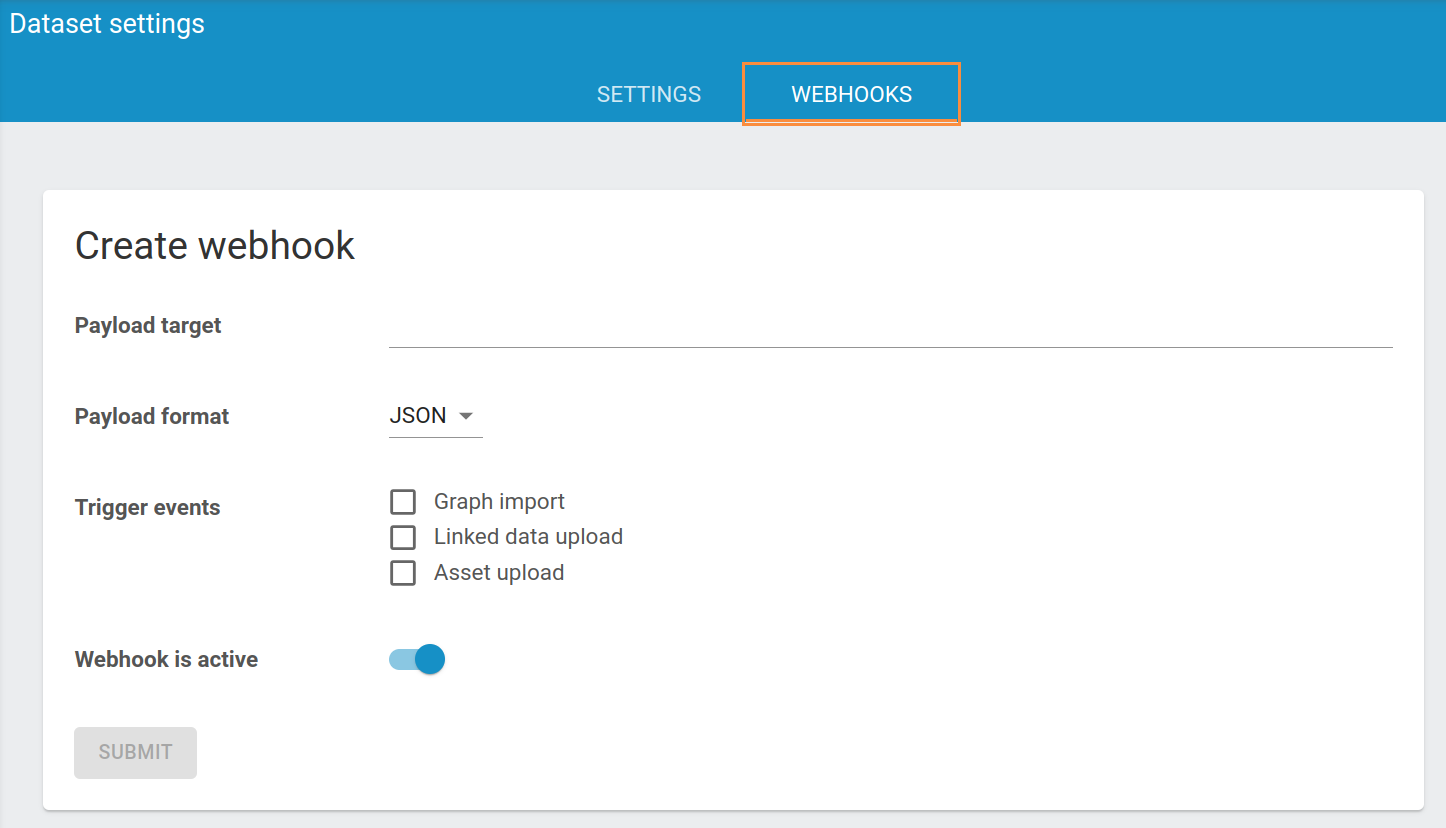
To create a webhook, you will need to provide the following information:
Payload target: The URL to which the webhook message should be sent.Payload format: The format of the message.Trigger events: Select for which event you wish to trigger the webhook. The options are:- Graph import: Happens when data is imported from a different dataset and where the data is already stored on the instance.
- Linked data upload: Happens when a person uploads data to the instance. The data did not exist on the instance before.
- Asset upload: Happens when an asset is uploaded.
After filling in everything, click Add. The new webhook is listed in the "Webhooks" section, with a toggle that activates and deactivates it, a pencil to change its settings and a bin to remove it.
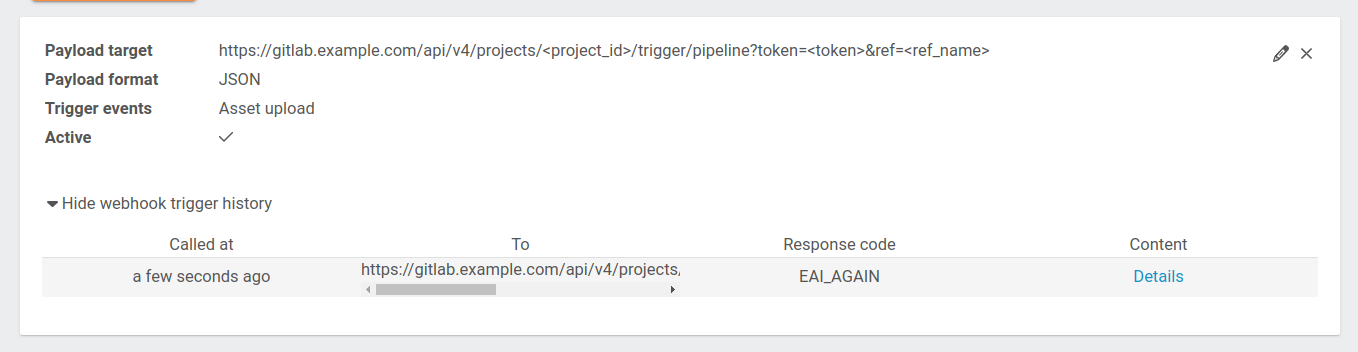
For example, if you wish to trigger a pipeline on gitlab every time you upload an asset to your dataset, you can use the below snippet as a payload target, as described on the official gitlab documentation and select Asset upload as a trigger event.
https://gitlab.example.com/api/v4/projects/<project_id>/trigger/pipeline?token=<token>&ref=<ref_name>
A webhook that is created and switched on is listed like this: